Showing posts with label Accessories. Show all posts

Kurt Kinetic Road Machine- My Exhaustive Review

Kurt Kinetic Road Machine- My Exhaustive Review!

The Kurt Kinetic Road Machine shines because of magnetic coupling, medical-grade silicone, and an unconditional guarantee. There’s a good reason the Road Machine’s the official trainer of the USA Cycling Team.
When Pam from Kurt Kinetic offered to send out a Kurt Kinetic Road Machine for review, I thought it was a great idea…for several reasons.
  • I’ve been pounding out mile after mile on my original Kurt Kinetic Fluid trainer for five winters now, and it’s never let me down.
  • In my obsession to search for the best bike trainers to recommend to my readers, the consensus has been that the Kurt Kinetic Road Machine is at the top of the heap.
  • But for some time now, I’ve been wondering how much different the Road Machine is from my ‘old’ trainer.
Well, it turns out that Kurt Kinetic hit on a winner with the original design… and except for a new ‘hair color’, the two units are nearly identical. Wisely, Kurt Kinetic decided to not fix something that isn’t broken.
There are now several new fancy Kurt Kinetic horses in the stable (namely, the Rock and Roll), but the Kurt Kinetic Road Machine is like a cowboy’s trusted quarter horse – not too flashy, but SOLID and impervious to breakdowns.
I do have an idea or two to make it even better, but I’ll get to that later…
kurt kinetic road machine1 e1304193685854 Kurt Kinetic Road Machine  My Exhaustive Review!
My Scott CR1 put on his best wheels to meet the Road Machine.
1) Magnetic Coupling Makes The Kurt Kinetic Road Machine Stand Out In The Crowd
Kurt Kinetic magnetic coupling e1292520824229 Kurt Kinetic Road Machine  My Exhaustive Review!
Cut away view of Resistance Unit
If you’re new to the bike trainer world you may not have heard of Kurt Kinetic’s unique magnetic coupling design. I’ll get you up to speed.
While fluid trainers are recognized as being at the top of the trainer food chain, they do suffer from a fatal flaw. They start to develop leaks when they shouldn’t, and have to be put out to pasture.
I’m just thankful that such a fate doesn’t await us older men when we start leaking inappropriately at social events. My kids assure me that I’m safe…at least for now.
Kurt Kinetic forged its place in the bike trainer world with a patent that eliminated the need for O-Rings (which predictably fail). In the Road Machine, the chamber containing the silicone fluid is completely sealed, and the roller which your bike tire is causing to spin is ‘virtually’ connected to the impeller by a magnetic coupler.
This is best understood by watching the video below.
Don’t get this confused with a mag trainer, which uses magnetic resistance to provide the workload.
The Kurt Kinetic system uses powerful magnets to couple the external roller assembly with the sealed impellers. That means that  there’s no shaft penetrating the inner sanctum of the fluid.
Check out the video later in this post for an excellent cut-away of the two chambers.

2) How Strong Are The Magnets In The Kurt Kinetic Road Machine?

There were times in the past when I’d accelerate on my Kurt Kinetic fluid trainer and feel some slippage. I wondered if the slippage was occurring inside the trainer; in the inner sanctum of the magnetic coupling.
It turns out it wasn’t the ‘innards’ that were failing. Here’s how I found out- I practically wore out my rear tire within the span of a couple of indoor rides. Like a meat head, I hadn’t put enough tension between the roller and my tire. All of that slippage was tearing the tire up.
Since those early ill-fated rides, I’ve discovered that the idea of me having enough power in my legs to disrupt the bond between the coupling magnets was wishful thinking. Kurt Kinetic’s testing demonstrated that the magnetic bond withstood an electric motor’s ability to suddenly accelerate the trainer from 0 to 50 mph without any slippage.
My abilities are somewhat less than that.
On a similar note, this trainer provides up to 3000 watts of resistance. As a point of reference, elite road cyclists may produce up to 1700 watts as an instantaneous maximum at the end of a road race. Instantaneous means for the first few seconds of their ‘jump’ as they accelerate.

Contour+ helmet camera – First ride review

The Full HD Contour+ has the best picture quality of any helmet cam we've tested but it's let down by poorly designed mounts and it's very expensive. It uses the same sleek brushed-alloy and plastic body as its predescessor, the ContourGPS, but this time with a smart raw finish and a wider angle lens (170 vs 135°). 

There's a large sliding 'record' button up top, which is easy to operate with gloved hands, along with a rotating lens so you can mount the camera at different angles. There's no screen but you can connect the Contour+ to your iPhone or Android mobile via Bluetooth and use your phone as a viewfinder, after downloading Contour's app. We tried this on both types of smartphone and found it works well. It's not as convenient as a built-in screen though, and we found it often takes a few tries to get the connection working. Another selling point of the Contour+ is the built-in GPS receiver, which tracks your filming location, speed and altitude, and can then display this information alongside your footage on your home computer using Contour's Storyteller software.

This too works well enough – see our review of the ContourGPS for more on this – but it isn't a feature that we found particularly useful. It can be turned off to save battery life but we'd rather Contour ditched it altogether and brought the price down a bit. The microphone jack is a good idea, though, and the HDMI output means you can watch your footage on your TV.
All of these ports are hidden under a flap at the back of the camera, along with the microSD card slot and Mini USB battery charge point. This doesn't seem particularly well sealed and, while we didn't have any problems during our three-week test period, we'd question how well it would stand up to prolonged rain. (A waterproof case is available separately for £42.99, and Contour are about to launch a new waterproof helmet cam.)

When it comes to filming quality, we've no complaints. The Contour offers a 60 frames per second 'Action HD' mode at 1,280 x 720 pixels, plus 'Tall HD' (1,280 x 960, 30fps), 'Original HD' (1,280 x 720, 30fps) and stills (5MP) modes. However, most of the time we left it on the 1,920 x 1,080 / 30fps 'Full HD' setting.

The resulting footage takes up quite a bit of memory so you'll need to swap the supplied 2GB card for something larger. Our replacement 8GB card was ideal, with space for around an hour of footage, by which time the battery was starting to run out anyway.
Image quality is excellent, with a crisp look that easily outdoes the Contour's peers. The Contour+ handles transitions from open fields to dark woodland well and offers faithful colour reproduction. Testing took in everything from dank British woodland to sun-drenched hillsides in the Alps, and the camera handled everything with aplomb, once we'd sorted out a decent mount.

And that's our main beef with the Contour+: the mounts. We tested Contour's Vented Helmet Mount (£16.99/$19.99) earlier this year with the ContourGPS and weren't impressed, finding that the tilt feature built into its base resulted in unacceptable levels of play unless we resorted to home-made bodges. This time, we thought we'd give the XL Handlebar Mount (available separately for £24.99/$29.99) and Rotating Flat Surface Mount (two are included with the camera) a go.

Play wasn't an issue with the former, but we found that no matter how hard we tightened it, the camera would tend to come lose during the course of each ride and end up tilting over. Mounted on a downhill bike, we found that vibrations through the bar also had a tendency to make the lens rotate, again resulting in a wonky picture. On top of this we had the same problem experienced with any bar-mounted camera: constant steering inputs by the rider result in a shaky picture. The Rotating Mount fared better. We attached it to a Fox V3R downhill lid with trepidation, expecting the glue to become unstuck at any moment and send the camera hurtling to the ground or, worse, into our face. But much to our relief, it remained affixed, even when wrenching on the camera to remove it for charging. In fact, it's still stuck solid now and we have no idea how to get it off.

While the connection between mount and helmet is solid, there's still a bit of play between the mount and the camera, even when it's locked in place; not enough to make the footage unwatchable but enough to cause unwanted shake. This would be easy enough to sort out with some creative use of foam but again, homemade bodges shouldn't be needed with a £500 camera.

It's a shame, because in every other respect the Contour+ is impressive. If Contour could sort out a decent mount, they'd be onto a winner. As it is, rival cameras with better mounts are available for a couple of hundred pounds less. The Contour+ is available in the UK through Ultra Sport Europe.

Muddy Fox Reflex review

Muddy Fox were one of the first big MTB brands in Britain over 20 years ago, but now they concentrate on the value end of the market. The Reflex is a good-looking bike with more control than most of its peers and some decent gear for its current reduced selling price too.

Ride & handling: Suspension is limited and adds little control but is generally clank-free

The Reflex’s low weight, relative to other budget options, is obvious in the way it picks up speed as well as when you get to any stiles or gates on the trail. It’s simply a lot less effort to propel forward than other similarly priced bikes which leaves a smile on your face for longer. Add something close to tangible traction from the Maiden tyres and it actually lets you go on the offensive on short climbs rather than just stalling straight away. 

The relatively stiff rear spring means it’s not a pogo stick either. There’s a definite loping gait if your pedalling rhythm syncs with the spring motion, but there’s not enough movement to really upset things. Critically the rear shock bounces off the stops at either end without sounding and feeling like someone’s just hit the bike with a sledgehammer. Whether it ever adds any control or comfort is a moot point, but at least it doesn’t make it worse than a hardtail, which is a rare credit in budget bouncer tests. 

The same is true of the front end too. Again the 50mm travel from the front fork feels more like squashing cheap bread than recognisable damping but the grease smears show you’re getting 50mm of movement to show your mates. Bottom out isn’t too brutal and it only tops out with a clang if you pop a wheelie or launch it off a (small) drop. There is a massive amount of twist in the fork thanks to the skinny legs and simple hoop brace. That means you’d probably be very wise to follow the ‘No stunting or jumping’ advice printed on the yellow warning sticker on the frame. Keep it on the ground though, and it will go vaguely where you point it most of the time. There’s not exactly much leverage coming from the narrow (600mm) bars anyway, so steering is best treated as a suggestion rather than  a detailed demand.

Frame: Small frame sizing needs careful checking

The alloy frame certainly looks the real deal, with shaping of both ends of the top tube giving a contemporary hydroformed look. The down tube is curved at the top and changes shape to a flat rectangle at the bottom bracket for decent stiffness at the pedalling centre. The main pivot is built into the rear of the bottom bracket block too, with a wide stance giving a reasonably stiff back end once we’d done the slightly loose rear pivot bolts up. 

The fact it has rear pivots – and a swing link at the back of the shock – is a big step up for the £200 price category though, as most bikes under £500 are just simple swingarm designs of one sort or the other. It doesn’t make a massive difference in actual suspension terms, because the rear pivots are on the seat stays not the chainstays so they don’t alter the axle path, but it certainly makes the Reflex look pukka. The lazy wound coil of the rear shock also works in a constipated but clunk-free manner. 

The frame has the mounts and cable guides ready to take a rear disc brake and there’s adequate mud room if you fit bigger tyres too.  Make sure you check sizing before you buy though – our 18in frame was tiny, with a short seatpost, which meant that we couldn’t get near proper pedalling height.

Equipment: Shimano gears are reasonably smooth

Muddy Fox have managed to put some decent gears on the Reflex. Acera and Tourney might be right at the bottom of the Shimano range, but at least they’re Shimano, and rear shifts from the Revo shift twist shifters are surprisingly light and crisp. The front chainset isn’t so slick though and you’ll really have to back off the pressure to swap rings so plan ahead on climbs. 

The V-brakes are metal at the lever and the wheel end which means a positive bite and adequate control as long as the rims are dry. While Maiden isn’t a tyre brand we’ve used before, the tread pattern on them popped its cherry about 20 years ago as the Tioga Pyscho. Even in a cheap plasticky compound, it still grips better than the tyres typically fitted on similar bikes, although we still needed to take care when riding them over wet roots or rocks. 

The alloy bar, stem and seatpost with a proper clamp, holding a proper shaped saddle rather than a sofa on a stick are a big bonus too. Not just from a cosmetic and reduced-rattle comfort aspect, but also because they help to keep the Reflex's weight down.

The Different Types of Cycling Equipment

The Different Types of Cycling Equipment

Various cycling team vary depending on the traffic to another, but some of the key elements of the cycling team that should be every person who travels on foot saddle. The most important accessory is a helmet, which can vary from inexpensive light and airy, without ventilation. In any case, the helmet should fit properly and should be used to avoid damage from an accident. A good helmet is the most important accessory of the bicycle, you can buy and invest in a good headset for comfort and safety.

Other important pieces of cycling equipment generally fall into three categories: components, accessories, and apparel. Special cycling clothes are available, and they are designed to cling close to the body for aerodynamics. They are made from wicking material that keeps moisture away from the skin for comfort and heat control, and specially designed shorts come with padding in the crotch to provide a more comfortable sitting surface while sitting on narrow and sometimes hard bicycle seats. Cycling gloves are another important piece of apparel that can help prevent blisters on the hands when riding longer distances or over rough terrain.

Cycling shoes come in a variety of designs. Many now come with special cleats that work in conjunction with a certain type of pedal called the clipless pedal. When the cleat is attached to the pedal, the rider's foot is ostensibly attached to the bike. This aids in the transfer of power and helps the rider achieve a more powerful pedal stroke.

Components on a bicycle are pieces of cycling equipment that help the bicycle run properly. Wheels, cranks, handlebars, saddles, and derailleurs all fall into the category of components. These pieces of equipment are replaceable if they break or become worn out, but many work only with other specific components. A chain, for example, only works with a cassette and derailleur/shifting system that is compatible. A 9-speed chain only works on a 9-speed cassette and with a 9-speed derailleur and shifter set.

Accessories run the gamut from water bottles to patch kits, from sunglasses to cycling computers. The cycling computer is a compact unit that mounts on the handlebar. A magnet attached to a spoke on the front wheel interacts with a sensor mounted on the fork. The sensor sends information to the computer, which tells the rider the current speed, distance ridden, and other valuable information. Computers are a relatively inexpensive accessory that can be very useful to the rider who is training for racing.

What are Cycling Shoes or Cycling Footwear?

What are Cycling Shoes or  Cycling Footwear ?

The cyclist, shoes designed specifically for cyclists. These problems are usually a bright, airy, not specifically to promote walking to cycling. This is the best with their feet, and the carbon atom, or a stiff plastic, and often unique.

Cycling shoes have a number of ways, bicycle pedals shoes, which are easier, if the person, or by mountain bike. Cycling shoes are often designed to be done for different types of traffic. Mountain bike shoes are the footwear of various construction-biking, hiking, or spin.  

One of the key features of cycling shoes is their degree of rigidity. A stiffer shoe translates to easier pedaling and keeps the feet and legs better aligned. Some cycling shoes are purchased with an attachment for the pedal. This is called a clipless pedal system. A cleat on the shoe’s sole attaches to a fitting on the pedal. These are some of the newest forms of cycling shoes and thought most efficient.

Earlier cycling shoes were designed to accommodate a toe clip. The toe clip is a small metal cage on the pedal into which the front of the foot is placed. Some toe clips were adjustable, allowing for the foot to fit securely. Others are looser, which means the foot can come off the pedal with greater ease. This was not always desirable feature, since people might have to readjust the foot to keep it firmly on the pedal. 

Certain types of cycling shoes can accommodate walking needs. People cycling on tours have pit stops and may need to be able to walk from one place to another. If you intend to use cycling shoes for touring, consider the type specifically designed for this. They can be recognized by their treads, not a common feature on other cycling shoes, and a small cleat. They are usually less rigid then other types of cycling shoes because a very rigid shoe is not comfortable for walking.


Mountain cycling shoes for the beginner can also feature some treads and a little flexibility in the toe. Again it may be necessary to get off the bike and walk at certain points, especially if you’re new to biking. Ask sports shoe experts for this feature if you’re just starting out as a mountain biker.


Usually, the best cycling shoes are those that very lightweight. Yet if you have no plans to cycle professionally, the cost of the best shoes can set you back several hundred US dollars (USD). If you bike only occasionally, but think you still might benefit from cycling shoes, consider an inexpensive pair, less than 100 USD. 

Of course, the occasional rider cycling shoes are useless. Use of shoes to a child who only want to see a cruise bike in the park. On the other hand, a child or an adult who wants to compete in the world of cycling with cycling shoes, the right kind of bike that wants to be equipped. 

Hate Relationship With Speedplay Pedals


Hate Relationship With Speedplay Pedals


I promptly went out and bought a set of these Zeros and I immediately loved them even more than my previous ones. They felt much more stable when clipped-in and the amount of float was much easier to get used to.This was back when Speedplays were different than today and had virtually infinite float. The model series back them was the X1, X2, X5 (I’m not sure if you can still buy them, but they’re still on their website). The free float was simply too much for me to handle. My feet were all over the place and my ankles would hit the chainstays when I got sloppy or tried to sprint.


Jump ahead to 2006. I started to develop some knee pain that wouldn’t go away and the old pedals I was using were dying a slow death. I had these Speedplays sitting around and decided to give them another shot. It took me about 2 weeks of dedication and heartache before I finally got comfortable with them. After I did, my knee pain subsided and I began to really like them. In fact, I now loved them.
They weren’t without their problems though. The small screws that hold the cleats onto the shoe kept coming loose or falling out. I also found I had to spend $80 on new cleats every 6-8 months. I was willing to deal with these issues however because I really loved these pedals. Then one day in an important race I made the final selection and my pedal completely seized up. It nearly tore my kneecap to shreds. I had felt a problem with something in my pedal or cleat early into the race, but I couldn’t tell what it was. As it turned out the bearings inside were completely dry and metal was rubbing on metal. In the final 10kms of the race I had to pedal to the finish line alone with one leg. Not happy.
Speedplays have evolved since the X series. Their most popular pedal now is the Zero series. The main difference that I noticed over the X series was the Zeros have an ajustable range of float.
The speedplay pedal itself is a wonderfully simple design, and most of the mechanics of engagement is contained in the cleat, not the pedal. It is nearly impossible to come unclipped by accident. The low profile design of the pedal itself makes a big difference when pedaling around corners. Speedplay has made some big claims about the aerodynamics of their pedal, but it’s going to take some major convincing before I can believe those windtunnel results will translate into going faster on the road.

Almost all bike fitters I’ve spoken with praise the Speedplay pedals for their adjustability. In my previous bike fits, much of the process focused on my cleat positioning and getting my legs tracking perfectly. There seems to be endless adjustability with Speedlpay cleats. I can’t say for certain that other pedals don’t offer this, but I’ve heard bike fitters rave about Speedplay time and time again.

This brings me back to the cleats. Problems with the cleat screws didn’t go away with the Zero design. The screws cannot be overtightened because this may prevent the springs from operating properly. Locktight is applied to the screws out of the box, but it doesn’t always work.  I’ve still needed to spend $80 on new cleats far too often because of excessive wear. Many of the pros will use these protector shims so the plastic on the cleat platforms don’t wear so quickly (due to pedal friction). It wasn’t until recently that I found out these could be purchased and previously I had bought this extender kit (for $50) because a local bike shop told me this was the only solution. Also, too many times have I had to use an angle grinder to remove my old cleats because of the wear to the screw heads from walking on them and stripping them.

I’ve had other problems with the Speedplay pedal itself. For example, during L’Etape last year I had to ride over 100kms with one foot. The pedal axels need to be greased every ~5000kms and there is a special tool needed to do this. I admit, the majority of my problems come from my lack of maintenance, but constant care and attention towards my pedals isn’t something that occurs to me until it’s too late.

Okay, enough of my Speedplay woes. I had been thinking of writing about this topic for a while, but before I did so I wanted to speak to someone from Speedplay about my issues. I emailed them and promptly got a reply from Richard Bryne. Shortly after I was on the phone with Richard (I didn’t know Richard was the owner and designer of Speedplay until the end of the conversation). He was an incredibly nice guy who explained many of my issues and the reasoning behind them. Let me share Richard’s explanations of the design decisions that are the cause of my greif:

- The philips screws that hold the cleats onto the base are there precisely so that they cannot be overtightened. There is an indexed “feeling” designed onto the screws so that the exact amount of tightening can be applied. These scews used to be hex allen key bolts, however they were easy to overtighten and would prevent the cleat springs from functioning properly. Locktight has been provided to the philips screws to prevent from loosening.
- The reason the pedals need to be greased every ~5000 kilometers is because of the bearing design. Many pedals use cartridge bearings, but Speedplay uses needle bearings because of their higher load rating and better performance. The drawback to needle bearings is that they slowly push the grease out to the side, thus the need to regrease your Speedplays every so often. Note: if the pedal spins nice and freely, this is a sign that it needs to be greased. The pedal should spin on the axel with slight resistance. This tells you the grease is doing it’s job.

- The wear protector can be used to prevent wearing of the plastic underneath the cleat or carbon sole of the shoe. As I said above, I didn’t know about this part until Richard told me about it and I had been buying the extender kit for this part alone and throwing away the extra pieces.

- Excessive wearing of the cleats can be reduced if you purchase the Coffee Shop Caps. These prevent dirt, sand, and friction from ruining the cleats.

- Dry teflon lube should be applied to the cleat springs every so often to keep it working and engaging properly.

Richard tells me that his biggest challenge is informing and communicating with people about how to maintain their Speedplays properly. I have to admit, until recently I had never pulled out the manual in the box and read the whole thing. He’s designed the pedals for maximum performance, which has it’s tradeoffs. Just like when buying a Ferrari, it’s a given that it’ll need more maintanence than most other cars.
I appreciate Richard giving me the time to explain these things and I truly believe Speedplay are working as hard as they can to make the best pedal possible. In many ways, they’ve definitely done that. If you speak to any of the pros who use them, they’ll agree.
A couple possible solutions I might suggest to make maintenance more obvious and easy: 

1. Inclue a cheap grease syringe along with every set of pedals. I don’t want to book my bike into the LBS every time I need pedal maintenance, nor do I want to spend $50 to purchase this tool. 

2. Include the coffee shop caps along with the pedals. These can surely be made for next to nothing. If they cost $5, I’m still happy to pay that little more.
I’m heavily invested in my Speedplays with regards to my positioning and spare parts and will unlikely ever switch from them. In my opinion, they are the absolute best pedals out there for adjustability, comfort and feel. Reliability definitely suffers if you don’t maintain them, and this has been an costly lesson for me. However, if you keep up with the suggested maintenance, they’ll last you a long, long time without any problems.  That said, I still feel the need to bring my box of spare Speedplay parts wherever I go.

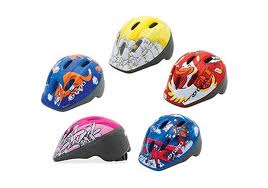
The Best Kids' Bike Helmets

How Do I Choose the Best Kids' Bike Helmets?

To choose the best kids’ bike helmets, the buyer should most consider fit and safety. Specialized helmet options might be required depending on the type of biking kids do, such as recreational, mountain, or racing. It’s also a good idea to let children have some say in the choice to encourage their compliance in safe biking.

The most important consideration in choosing kids’ bike helmets is fit. Buyers may notice a variety of different sizes, such as toddler, and small through large childrens' sizes. Alternately, some helmets are one-size-fits-all, and the dimensions may vary. Sometimes older kids and teens are better served with adult sizes. In any case, trying on several helmets is the best way to determine the right size, but most have some adjustable features that can customize the fit.

Foam padding in the helmet’s interior can be left in for a snugger fit or removed to give extra room. With or without use of these pads, a close fit doesn’t allow the helmet to be easily swiveled or twisted from side to side, but the head shouldn’t be squeezed. The brim should sit about an inch (2.54 cm) above the eyebrows, though some brims have a sun visor attached that will reduce this distance. An adjustable chinstrap also helps to secure the helmet in place.
Buyers will also want to evaluate kids’ bike helmets by their compliance with regional safety standards, which should be listed on the packaging. They might consider choosing these biking accessories by what has been labeled “best” by consumer review agencies. Lists of the best equipment options may be available in magazines or on websites, and shoppers are advised to follow the most current recommendations. Outdated lists may not be as helpful.


Most children are recreational bikers and the best kids' bike helmets for this type of riding may be surrounded with a hard plastic exterior or slightly softer foam. Both are good choices, provided they meet safety standards. When choosing kids' bike helmets for racing or mountain biking, shoppers should look for ones suited to the particular sport. These are often lighter, more durable, and more expensive.

To encourage safe biking habits, it may be wise to let children pick out their favorite helmet. This could better assure a child will actually wear what he selects. Shopping locally is often the best way to satisfy fit requirements and child preferences at the same time.

Standard guidelines for replacing kids' bike helmets recommend purchasing a new one anytime a crash impacts it, even if it doesn’t look damaged. Alternately, a new helmet should be selected every three to five years. This advice may not be entirely accurate, and depends most on the age and growth rate of the child. It’s suggested parents do a fit check every half-year and make any needed adjustments or replace the helmet if it is too small.

The Best Cycling Helmet

How Do I Choose the Best Cycling Helmet?

A cycling helmet is an essential piece of equipment that can prevent severe head injuries or even death. It is important to choose a cycling helmet that fits your head properly, and it is also vital that you do not ever buy a used helmet; only consider a new cycling helmet for purchase, as used helmets may have hidden cracks that can compromise the integrity of the helmet. Used helmets may also become brittle with age, meaning they will not adequately protect your head. Choose a helmet that fits your budget, too, as helmets range from very inexpensive to prohibitively expensive.

All cycling helmet offerings from recognized companies are built to the same safety standards, and in order to be offered for purchase, every helmet must be inspected for quality and correct construction. In other words, no one brand of helmet is safer than another. All helmets must meet safety regulations, ensuring any helmet is safe enough for regular use. Finding the best helmet is therefore a matter of finding a helmet that looks good and fits well. The styles and shapes of helmets will vary significantly, and many helmets feature elaborate shapes to cut down on weight and to increase venting capabilities, keeping your head cool and dry throughout your ride. Look for a helmet that is well-vented and seems sturdy.


Most modern cycling helmet models feature adjustable fit systems that will allow you to cinch the helmet down snugly on your head. The fit system should be easy to use and should hold the tightness regardless of head movement throughout the ride. If the fit system features a dial, be sure the dial can be moved easily with one hand so you will be able to adjust the helmet's fit on the fly without having to stop your bike to perform this task. Be sure the neck strap can be adjusted as well, and check whether the strap will adjust snugly but not uncomfortably underneath your chin. 


If you are a mountain biker, consider a helmet with a visor. Cycling helmet visors will help block sun, and they will also help stop branches or other debris from striking your face while riding. Many helmets feature removable visors so you can use the helmet for either mountain biking or road cycling. The visor will affect the aesthetics of the helmet, so be sure to consider whether this design appeals to you or not.